Friday, April 23, 2010

Etsy Bloggers Blog Carnival: Birthdays

Howdy, folks! It's time for another blog carnival, and this one, hosted by Joey and Aleethea, is all about birthdays!

Tell us about your birthday/what astrological sign you are/what are your plans for your birthday this year?

My birthday was back in February, on the 5th - the same day as H. R. Giger and Hank Aaron.  I'm your typical creative and somewhat quirky Aquarius, the water bearer (though, I'm far more likely to come bearing tea or coffee).  I was also born in the year of the rat.

As for plans, I don't really have any.  Having a nice dinner has been my small, simple birthday tradition for several years now.  I'm not one for big celebrations.  After all, I'm just another year older, and I think we all wonder at times if that's really something to celebrate.  In fact, I think I could stop having birthdays right now and be perfectly happy.  26 forever?  Sounds great!  Where do I sign up?

Thursday, April 22, 2010

Thursday Threads: Eco-Friendly Fashion, Part 2

Happy Earth Day, dear readers!  I know I celebrated the coming of this auspicious day last week with an eco-friendly fashion feature, but I couldn't think of a better way to honor today than a sequel of sorts.  I certainly didn't have any trouble finding enough items.  In fact, the hard part was picking just a few.  But I did, because I had to.  And here they are...

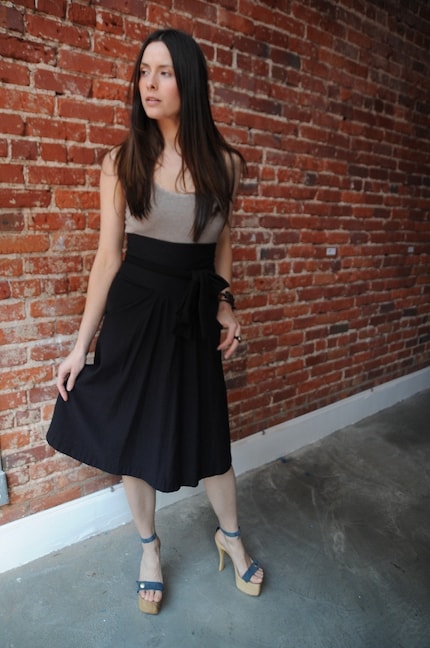
Pretty Birdie's High Waisted Bamboo Swing Skirt by stephanieteague


This beautiful skirt is made with bamboo and organic cotton and is available in several colors. Bonus: It's hand-dyed with eco-friendly low impact dyes. Cool.

Crossley Hooodie by simplebear


Both the inner jersey lining and outer fleece lining of this unique, asymmetric hoodie are 100% organic cotton. And doesn't it just look super cozy? Bonus: You get to choose your colors! And both fabrics are available in several, so there are oodles of possible combinations.

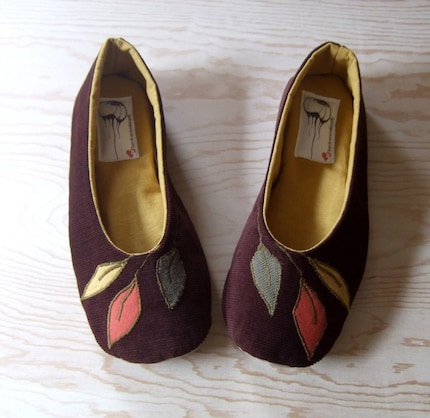
Flora Flat by HydraHeart


These adorable, nature-inspired flats are totally vegan! No leather to be found here, only fabric and rubber. Bonus: No need to worry about wearing them in the garden or out in the woods. These babies are washable!

So there you have it - three awesome artists doing their part for the earth. Now, what are you doing?

Wednesday, April 21, 2010

Mostly Wordless Wednesday: Blossoms

Anyone else participating in the 365 Project?  If you haven't heard of it, basically, the premise is to take a photo every day for an entire year.  I've been working on it since March, and while I've been good about taking my photos, I'm dreadfully behind on uploading them.  Still, you can see what I have uploaded here.

Tuesday, April 20, 2010

Tutorial Tuesday: Eco-Friendly Tote

I mentioned my earth-friendly efforts in my last post, but something happened between then and now. I saw this. If you're not familiar with the Great Pacific Garbage Patch, as I was not, it's basically an enormous floating mass of trash--mostly plastic. Google it and you'll find some truly horrifying photos.

To make a long story short, I decided I had to do something, anything, whatever I could. So lately, I've been making strides to do more. I've gone semi-vegetarian (flexitarian, if you will). I've been researching various green products, and just educating myself about green living, in general. I've begun taking my own tote bags to the grocery store. And I've been looking for ways to recycle plastic. Our local recycling center takes bottles, but what is one to do with other plastic items?

Well, Etsy gave me a good use for one of the most prolific plastics. Grocery bags. This How-Tuesday post shows you how to use grocery bags to make plastic yarn and crochet a cute tote bag. How cool is that?

I've already started working on mine, and though making the "plarn" is a bit time-consuming, I think it's well worth the effort. And I'm sure it goes faster once you've had a bit of practice.

I'll let you know how it goes and post pictures once I'm done. In the meantime, why not tell me about your recycled creations!

Thursday, April 15, 2010

Thursday Threads: Eco-Friendly Fashion

I've always been "eco-conscious." Ever since I was a wee critter-loving tot, I've done my best to follow the three R's. I'm always trying to reduce the amount of crap I throw away. So I reuse what I can (shoe boxes are great for storage). I recycle what I can, both in the conventional dump-it-in-the-bin kind of way and also in the crafty, "upcycling" way. I like to think I'm pretty earth-friendly.

And now, with the current eco-craze, it's easier than ever to do your part. Organic foods are all over the supermarkets. Your options at the checkout are now paper, plastic, or eco-friendly reusable tote. Electric companies are even offering green energy options to their customers. Talk about an awesome trend.

So to celebrate this green renaissance--as well as the coming of Earth Day--I've dedicated this week's Thursday Threads to eco-friendly fashion. Kudos to these creators for respecting their mother (Mother Earth, that is).

Lil' Miss Sailor Shirt by sewmoe


Snazzy little sailor shirt made in a bamboo knit fabric. I can only guess how ridiculously comfortable this must be, as I've never worn bamboo. But I have gotten my paws on some bamboo yarn and it's just amazingly soft. An entire shirt made of the stuff? Yummy.

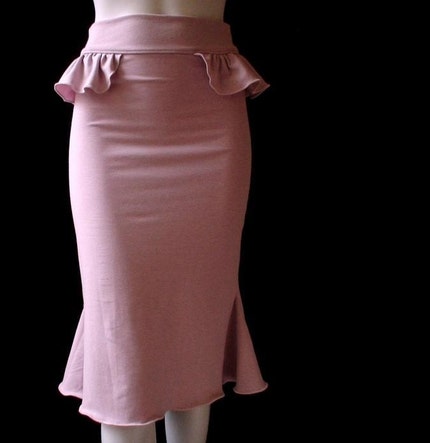
Mademoiselle Skirt by econica


This lovely skirt has a lot to offer--a touch of ruffle, a hint of retro, and plenty of options. It's available in 14 different colors, in an organic cotton/bamboo blend. And the colors are all so lovely... Who could pick just one?

Hemp Patchwork Apron Dress by peacebird


Isn't this just gorgeous? It reminds me of stained glass. And it looks so comfy! As it should. After all, it's made with hemp cotton. I'd love to have a dress like this to romp around in when summer comes. So I'll start saving my pennies.

In the meantime, why not leave a comment and share your favorite eco-friendly finds?

Wednesday, April 14, 2010

I Need Fans!

So I was intending to write up a nice little feature today. But I haven't felt very well the last couple of days, and I just couldn't muster the energy for all the work involved. So instead, I thought I'd keep things brief and let you in on the latest news...

The Ash Grove is now on Facebook! So come check out my page and become a fan. I'll be holding special giveaways and offering exclusive deals for my Facebook fans in the future, so it's in your best interests, really. And besides, it'll make me smile.

So, I'll see you there! :)

Wednesday, April 7, 2010

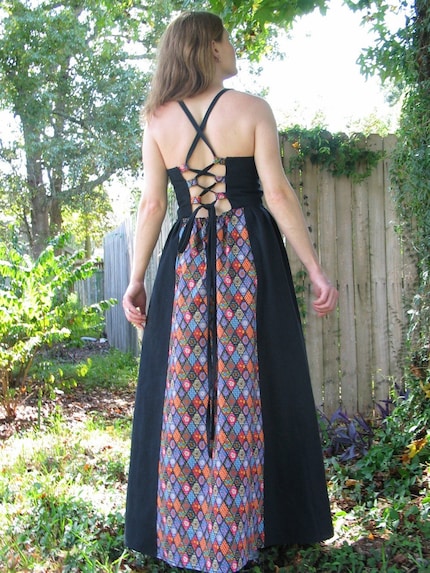
Wicked Wednesday: April Showers Bring Steamy Flowers

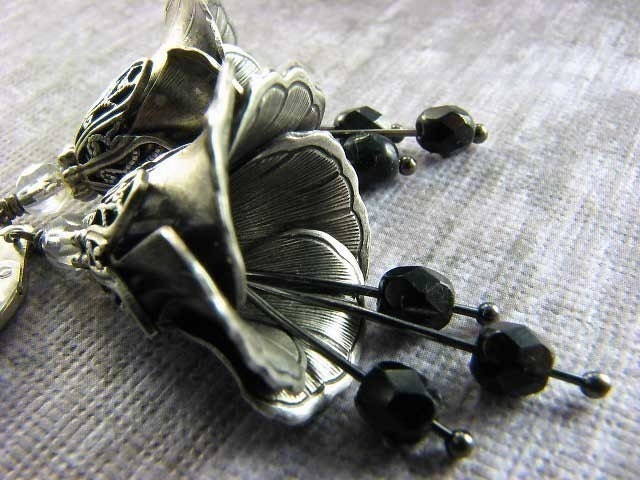
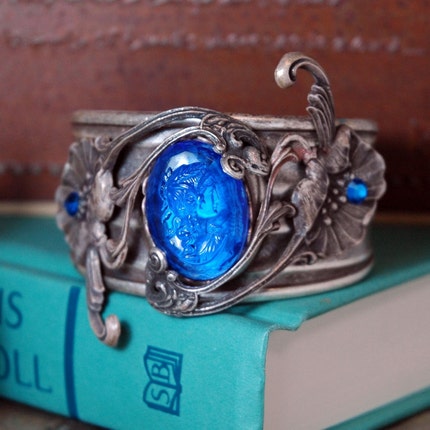
Gosh, it's been ages since I did a Wicked Wednesday post, hasn't it?  Well, when I set out to write today's post, I knew I wanted to do a gothic homage to spring.  But how to showcase the darker side of such a bright, sunny season...?  Simple.  Flowers!  Flowers are one of the first things I think of when I think spring, and while they can certainly be bright and cheerful, they can also be dark and elegant--just think of roses.

I found a lot of great flowers floating about the Etsysphere, but I finally narrowed my choices down to jewelry items and, quite serendipitously, this collection came to be more "steampunk" than "goth."  But to heck with labels.  Let's just call it all beautiful!


So there are my picks.  Now let's see your steamy, springy favorites!

Tuesday, April 6, 2010

Tutorial Tuesday: Upcycled Magazine Holder

When I started setting up my craft corner, I decided right off the bat that I was going to make organization a priority.  Mostly so I could spend less looking for things and more time making things, but also because I just really enjoy organizing things.  Of course, putting everything in its place meant that... well, it needed a place.  I bought a couple of little plastic containers at the dollar store, added on to my sophisticated shoebox system, tucked some stuff in the latest box from Amazon...  I even borrowed some baking cups from the kitchen to hold my paperclips and pushpins.  I'm very fond of repurposing things for storage. 

So when we came across a blurb in an issue of Better Homes and Gardens that suggested making magazine holders out of cereal boxes, I knew I was going to have to try it.  But whereas they left the boxes undecorated aside from a label on the side, I decided to kick things up a notch and cover mine with wrapping paper. 

 Here's what I wound up with:


Have I not mentioned my mild obsession with  fondness for Hello Kitty before? 

Anyway... This was all well and good for holding my magazines, but what I still had a whole stack of folders full of patterns and tutorials and such.  I had some more cereal boxes, but alas, none of them was quite wide enough to accommodate the folders.  But we happened to have another box lying around that was just the right size, so I decided to just adapt the method to make a slightly bigger box.  And while I was at it, I figured I'd document the process and write up a tutorial for all my dear bloggy friends.

So, enough rambling.  Let's get started, shall we?


Here's what you'll need:

  • A box of some sort.  Doesn't really matter what kind, so long as it's big enough to hold whatever you want to store in it.  
  • Scissors or utility knife, craft knife, x-acto, etc.  I used the utility knife because the cardboard was rather thick.  And also, I just suck and scissors.
  • Ruler 
  • Sharpie (or other writing utensil to mark your cutting lines on the box)
  • Tape
  • Wrapping paper (or whatever you wish to cover your box with; I just used wrapping paper because it was big enough that I could cover the box and only have one visible seam)
 Step 1: Remove Flaps


Using your preferred tool, cut the flaps off the top of your box.  If you're like me and you can't cut a straight line to save your life, don't worry.  Most of this top portion is going to get cut away later anyway. 

Step 2: Measure and Mark

 
Grab your ruler and sharpie and measure up 4.5" from the bottom of your box.  Make a mark at this point.  Then, measure 3" in from the other side and make a mark at the top of your box.  Now connect the dots.  This is the line you'll be cutting along later. 

But first, to make your life a little easier, flip your box over and repeat this process on the other side.  And, if you'd like, draw a line on the end connecting the two bottom points. 

Step 3: Cut

 
Cut along the lines you just marked using whatever tool your prefer.  I used my utility knife and ruler to get nice, straight lines, but scissors will get the job done too.

Step 4: Get Wrappin'


If you're familiar with gift wrapping, you can probably figure this out on you're own.  But just in case you're not, let's take this step by step...

First off, you're going to need a rather large, fairly flat surface. The floor is probably best, but I used the bed because it was there.  Roll out your wrapping paper and place your box near the edge.  Fold up the edge so that it partly covers the end of the box and tape it in place (I didn't do this, as you can see in the picture above, and I ran into a minor problem later--learn from my mistake).

Now, grab the roll of paper and bring it over the front of the box.  You need to get a general idea of where to cut your paper so that you'll have enough for the edges to overlap, so find that point and make a crease (or mark as you please), then cut your paper at that point. 

Tape the newly cut edge in place and your box should now have a nice, if somewhat oversized, paper belt.  Like so:


If you look closely at the right side, you'll notice there's a gap between the edges.  That's the issue I mentioned earlier.  I flubbed my guesstimating because I didn't tape the first edge to keep it from shifting.  If this happens to you, don't panic.  It's a pretty easy fix.  But we'll talk about that later.  On with the wrapping...

Next we're gonna deal with the bottom.  But first thing's first.  There is probably way more paper there than you're gonna need, so go ahead and trim it off.  Ideally you should have have about 3 inches or so to work with. 

Now comes the part that's tricky to explain...  You need to push in the sides, so that they're flat against the bottom of the box and a sort of triangular flap is formed, like so:


When you push the sides in, this is the way the paper will naturally want to fold, so just go with it.  Crease those folds and smooth things out. 

Now repeat the process to form a flap on the top.  Like this:


Now that you have your two flaps, you need to tape 'em down.  It doesn't really matter which way, but I personally find it easier to tape the bottom flap to the box first, and then folds down the top flap and tape it in place.  Either way, you want to make sure to pull the paper tight against the box, so it's wrapped nice and snug. 

And... voila!


Again, you'll notice the gap left from my earlier goof.  Not a big deal here, obviously, 'cuz it's on the bottom.

Pretty easy, huh?  Well, wrapping the rest of the box is even easier.  You'll wanna have your scissors handy, because you'll be doing a lot of trimming and cutting.

I started with the short end, but you can start wherever.  Basically, all you need to do is trim the section your working with down to a manageable size, locate the nearest corner, and cut straight down until you meet it, so you're left with a flap, like this:


Then just fold down the flap and tape it to the inside of the box.  Now work your way around the rest of the box in the same manner--cut straight down at the corners, fold over the flap, tape it to the inside.  Simple.  

You may notice at the corners, unless you're cutting is totally perfect, that the paper tears just a bit.  You can place a small piece of tape at the corners to neaten things up and give them a bit of reinforcement, if you wish, but it's not strictly necessary.

Once you're done with all your cutting and taping, you'll have something like this:


Of course, if you goofed like I did, you're not quite finished.  To cover the gap on the end, I just cut a piece of wrapping paper a wee bit bigger than the end and taped it in place...


It's taped on the inside, bottom, and right at the corners, so it's barely even noticeable.

And there you have it!  A simple, creative way to put those old boxes to good use and get things organized.  I hope you enjoyed this tutorial, and if you have any questions, just leave me a comment.  :)

Monday, April 5, 2010

Monday Motivator: Everything's Blooming!

I haven't been posting much lately, so you might think there's nothing interesting going on in my world. But that couldn't be farther from the truth. This spring, while everything outside is blooming, it seems like my creative/business life has blossomed as well.

For starters, I finally managed to snag a treasury Saturday. And *drum roll please* it made the front page last night! :D


And here the original Treasury.  Apparently the Etsy community likes tentacled critters just as much as I do.  This was such a pleasant surprise to discover.  Thanks to everyone who clicked and commented! 

In addition, I've seen a BIG increase in views lately.  And according to Google Analytics, I have Twitter to thank for that.  Specifically the World Wide Etsy Sellers group.  This awesome group of Tweeters has helped me in a number of ways, not just with all of their kind tweets and re-tweets.  They've also helped Twitter feel more like a community to me.  I've been a big fan of Twitter right from the start, but whenever I tweeted about my shop I felt kind of... spammy.  But the folks from WWES do all sorts of tweeting for me.  And when I do tweet about my shop, they re-tweet.  And I return the favor, and we all just spread the Twitter-love.  So if you're feelin' a little lonely out there in Twitter Land, stop by the blog, read the rules, leave a comment, and join the group!

And last but not least, I believe I mentioned in my last post that I was working on my new work area, which I have officially dubbed the Crafty Corner.  This rounds out the Trifecta of Inspirations.  I intend to devote a whole post to it once I've finished moving and organizing things, but in the meantime, I must say, I have a new favorite part of the house.  And I can hardly believe the difference that having this space has made already.  There's just something about establishing a dedicated space for your crafty work that just makes it feel so much more... professional.  I'd say "serious," but I can never be serious when I'm crafting.  It's too much fun!

So all of this together has combined to give me one big boost in confidence.  I'm getting some recognition now.  If my treasury made the front page, my items can to.  I can be a success, and I will be.  Because I'm never going to give up.